
Setting up a proxy on Windows 11 can help you change the IP address websites see when you browse the internet. It can also be useful for checking regional content, doing market research, or connecting through a company network. However, if you're new to proxy settings, it may not be clear where to start or which options to choose.
The good news is that Windows 11 has built-in proxy settings, so you don't need extra software for a basic web proxy. In this guide, you'll learn how to set up a proxy on Windows 11 manually or automatically, check whether it works, and fix common connection problems.

What You Need Before Setting Up a Proxy on Windows 11
Before you set up a proxy on Windows 11, make sure you have the right proxy type and connection details. You don't need advanced technical skills, but a wrong address or port can stop the connection from working. Getting this information ready will make the setup much easier.
Choose the Right Proxy Type: HTTP, HTTPS, or SOCKS5
Not all proxies work the same way. HTTP proxies are often used for regular web browsing, while HTTPS proxies can provide an encrypted connection between your device and the proxy server. SOCKS5 supports more types of traffic, making it useful for apps that need more than basic web access.
For most users, an HTTP proxy that supports HTTPS websites is enough for everyday browsing. Windows 11's standard manual proxy settings are mainly designed for web proxies. If you plan to use SOCKS5, check whether your browser or app supports it and how it needs to be configured.
Get Your Proxy Server Address, Port, and Login Credentials
Once you choose a proxy, collect the connection details from your provider. You will usually need a server address, a port number, and possibly a username and password. For example, a provider might give you an address like proxy.example.com and port 8080. These are sample values, not a working proxy.
Keep these details nearby before opening Windows 11 proxy settings. According to Microsoft's official proxy setup guide, manual setup requires a proxy server address and its port when applicable. If your provider uses login details, you may also need to enter them when your browser or app asks for access.
How to Set Up a Proxy on Windows 11 Manually
Now that you have your proxy details ready, you can start the setup. Windows 11 has a built-in option for manual proxy setup, so you don't need to install extra software for a standard web proxy. The process only takes a few steps, whether you're using a home Wi-Fi network or an Ethernet connection.
Step 1: Open Windows 11 Proxy Settings
Start by clicking the Start button and opening Settings. You can also press Windows + I on your keyboard to open it faster. In the left menu, select Network & internet, then scroll down and click Proxy. This page contains both automatic and manual proxy settings.
Step 2: Enable Manual Proxy Setup
On the Proxy page, find the Manual proxy setup section. Click Set up next to Use a proxy server to open a new window. Turn the Use a proxy server switch to On. You will now see the fields where you can enter your proxy connection details.
Step 3: Enter Your Proxy IP Address and Port
Enter the server address from your proxy provider in the Proxy IP address field. Then enter the matching number in the Port field. For example, if your provider gives you 192.0.2.10:8080, enter 192.0.2.10 as the address and 8080 as the port. This is only a sample address, so replace it with your real proxy details.
You may also see an option to exclude certain websites from using the proxy. For example, if you want to access an internal company site without the proxy, you can add its address to the exception list. You can leave this field empty if you don't need any exceptions.
Step 4: Save the Settings and Authenticate Your Proxy
After entering the details, click Save to apply your Windows 11 proxy settings. Open Microsoft Edge or another browser and visit a website to check the connection. If your proxy requires a username and password, your browser may ask you to enter them. Use the credentials provided by your proxy service, not your Windows login details.
If the page doesn't load, check the address and port for typing errors before changing other settings. You can also visit an IP lookup website to see whether your public IP address has changed. Keep in mind that some apps use their own network settings, so the Windows proxy may not affect every program.
How to Configure Automatic Proxy Settings on Windows 11
Manual setup works well when you have a fixed proxy address and port. But if you use a company or school network, you may not need to enter these details yourself. Windows 11 also supports automatic proxy settings, which can find the right connection or load a setup script for you.
Method 1: Enable Automatically Detect Settings
To set up a proxy on Windows 11 automatically, open Settings > Network & internet > Proxy. Under Automatic proxy setup, turn on Automatically detect settings. Windows will then try to find a proxy configuration provided by your network, so you won't need to enter an IP address or port.
This option is useful on office networks where proxy settings are managed by an IT team. However, turning it on does not mean Windows will always find a proxy. Your network must support automatic proxy detection for it to work.
Method 2: Configure a Proxy Using a Setup Script
Some networks use a Proxy Auto-Configuration (PAC) script to control which websites use a proxy. If your IT team provides a script URL, return to Settings > Network & internet > Proxy. Find Use setup script, click Set up, and turn the switch on. Enter the URL in the Script address field, then click Save.
For example, a company might use a script to send work-related traffic through its proxy while allowing other websites to connect directly. You don't need to write the script yourself. Just use the address provided by your network administrator and make sure it comes from a trusted source.
How to Set Up a Proxy on Windows 11 Using Control Panel
Besides the Settings app, you can also set up a proxy on Windows 11 through the classic Control Panel. This method is useful if you want to enter different proxy settings for HTTP, HTTPS, or SOCKS connections. It offers more options than the standard manual setup screen, although not every app will use these settings.
Step 1: Open Internet Options and LAN Settings
Press Windows + R, type control, and press Enter. Go to Network and Internet > Internet Options, then select the Connections tab. Click LAN settings and check Use a proxy server for your LAN. You can now enter your proxy details or open the advanced settings.
Step 2: Configure Advanced Proxy Server Settings
Click Advanced to open the detailed proxy settings. Here, you can enter separate server addresses and ports for HTTP, Secure (HTTPS), and SOCKS connections. For example, if your provider gives you different ports for web traffic and SOCKS traffic, you can enter them in the matching fields. Make sure you use the correct values from your provider, since entering the wrong port can cause connection errors.
Step 3: Apply and Save Your Proxy Configuration
Once everything is entered, click OK to close the advanced settings, then click OK again to save your LAN settings. Close the Internet Properties window and open your browser to test the connection. You can visit an IP lookup site to check whether your public IP address has changed.
Keep in mind that Control Panel and the Windows Settings app share many of the same proxy settings. You don't need to configure both methods separately, and some applications may still require their own proxy setup.
How to Check If Your Proxy Is Working on Windows 11
After you set up a proxy on Windows 11, it's worth checking whether the connection works as expected. A saved proxy setting doesn't always mean your browser is using it. Two simple tests can help you confirm that your traffic is going through the right server.
Check Your Public IP Address and Location
Open your browser and visit an IP lookup website like WhatIsMyIP. Check the public IP address and location shown on the page. For example, if you configured a US proxy while browsing from another country, the website should normally show the proxy's US IP address rather than your usual one.
For a clearer result, turn off the proxy and check your IP again, then turn it back on and repeat the test. The addresses should differ if your proxy uses a different exit IP. Keep in mind that IP-based location results are estimates, so the reported city may not always be exact.
Test Your Proxy Connection in a Web Browser
Next, open Microsoft Edge or Chrome and visit a few websites you normally use. Try loading a search page, opening an article, and refreshing the page. If the sites load and the IP check shows your expected proxy address, your browser is likely using the proxy correctly.
If pages fail to load, return to Settings > Network & internet > Proxy and check your server address, port, and login details. Also remember that some applications may not follow Windows proxy settings, even when your browser works correctly.
How to Fix Common Proxy Issues on Windows 11
Even if you follow every step to set up a proxy on Windows 11, you may still run into connection problems. Websites might stop loading, login requests may fail, or your IP address may stay the same. Most of these issues have simple causes, so it's worth checking a few things before replacing your proxy.
Windows 11 Proxy Server Not Responding
If your browser shows a proxy server error or pages won't load, first check whether the server address and port are correct. Open Settings > Network & internet > Proxy and compare them with the details from your provider. You can also turn off the proxy for a moment and try loading the same website. If the site works without the proxy, the problem may be with the proxy server or its connection.
Proxy Authentication Failed or Incorrect Credentials
Some proxies require a username and password before allowing traffic through. If you keep seeing a login window or an HTTP 407 Proxy Authentication Required error, check that your credentials are correct. For example, some providers use special usernames that include location settings, so leaving out part of the username can cause a login failure. If the details are correct but the error continues, check whether your proxy account is active or contact your provider.
Windows 11 Proxy Settings Keep Turning Off
If your proxy settings keep switching off or changing, check whether your computer is managed by a company or school. An IT policy or a network setup script may control which proxy settings Windows uses. Open the Proxy settings page and check whether automatic configuration is enabled. If your device is managed, ask your IT team before changing its network settings.
Proxy Is Connected but Your IP Address Hasn't Changed
If websites load but your public IP stays the same, your browser may not be using the proxy. Check whether Use a proxy server is enabled and whether the website is listed as a proxy exception. Some browsers and apps also use their own proxy settings instead of the Windows configuration. Try checking your IP in Microsoft Edge, then compare the result with another browser to see whether the issue is app-specific.
Set Up PuraRoute Proxies on Windows 11 for Reliable Connections
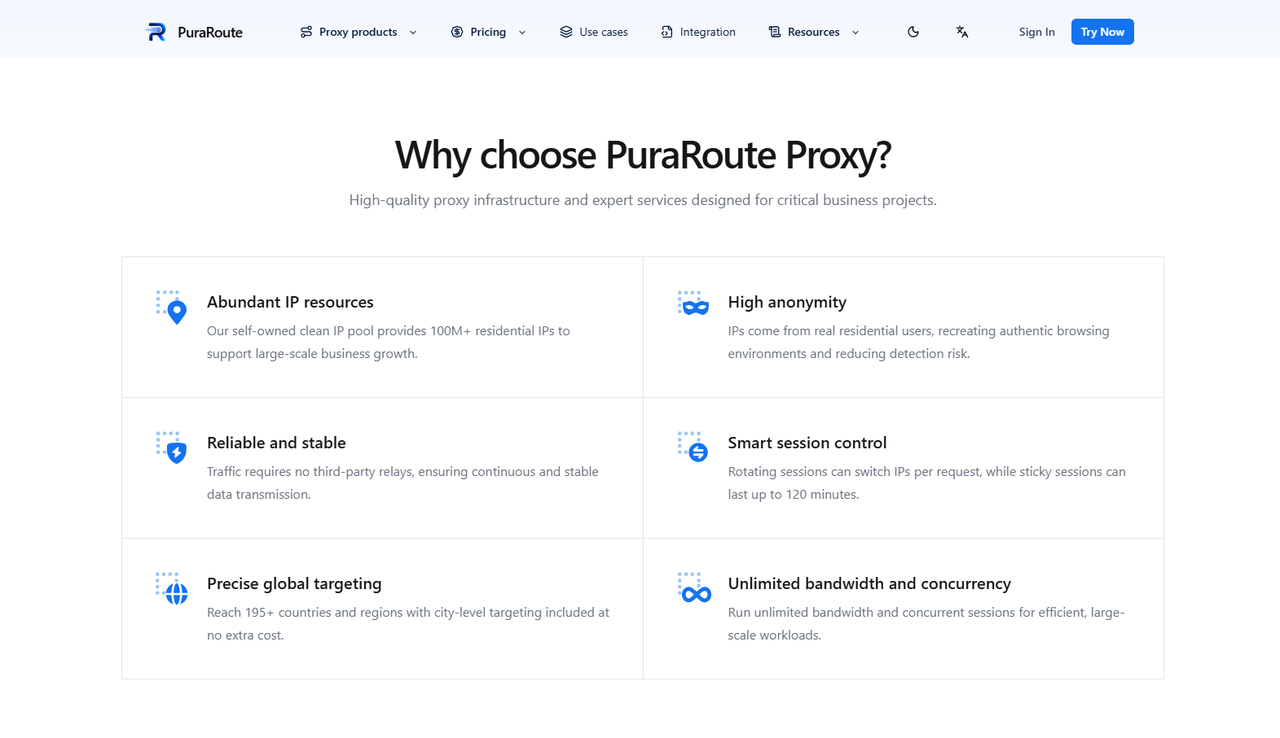
If you've checked your Windows 11 proxy settings but still have connection problems, the proxy service itself may be worth looking at. Different tasks need different IP types, locations, and connection options. For users who need residential IPs for web browsing, market research, or e-commerce work, PuraRoute is one option to consider.
Choose Between PuraRoute Dynamic and Static Residential Proxies
When choosing a proxy, think about how often you need your IP address to change. With PuraRoute Dynamic Residential Proxies, you can choose rotating IPs for tasks like checking public product listings or use sticky sessions when you need to keep an IP for a short period. For example, if you're comparing product prices across several websites, rotating IPs may suit your workflow.
If you need to keep the same IP for longer, Static Residential Proxies may be a better fit. They provide a dedicated IP for the purchased period, which can be useful for managing authorized store accounts or other tasks that benefit from a consistent connection. Keep in mind that a fixed IP does not guarantee uninterrupted access to every website.
If you're unsure which type fits your work, you can read this guide on dynamic vs. static residential proxies. It explains how session length, IP changes, and traffic needs affect your choice.
Access Residential IPs Across Multiple Countries and Regions
Your IP location can affect the content you see online, especially when checking local search results, prices, or regional websites. If you're researching the US and UK markets, for example, you may want to compare what visitors from each country see. PuraRoute's dynamic residential network covers 195+ countries and regions, with country, state, and city targeting options where available.
You can select a location based on your task, but available IPs may vary by region and current inventory. Also, using an IP from another country does not mean every website will show the same content as a local visitor. Some sites also consider account settings, cookies, and other location signals.
How to Configure PuraRoute Proxy Credentials on Windows 11
If you decide to use PuraRoute, start by signing in to your dashboard. After purchasing your preferred proxy type, open the relevant proxy configuration or resource page to get your server address, port, username, and password. For dynamic residential proxies, you can also select an available region and session type before generating the connection details.
To set up a proxy on Windows 11, go to Settings > Network & internet > Proxy > Manual proxy setup. Turn on Use a proxy server, enter the address and port from your dashboard, and click Save. If your browser asks for proxy authentication, enter the provided username and password. For SOCKS5 connections, you may need to configure the proxy directly in a compatible application instead.
Once the setup is complete, visit an IP lookup website to check your connection. Compare the displayed address and location with the proxy you selected. If they don't match, review your connection details and proxy settings before trying again. You can also refer to the PuraRoute integration guide for help with generating connection details and checking your proxy configuration.
Frequently Asked Questions About Windows 11 Proxy Settings
Where Can I Find Proxy Settings on Windows 11?
To set up a proxy on Windows 11, open Settings > Network & internet > Proxy. From there, you can choose manual or automatic proxy setup and enter your connection details.
Does Windows 11 Support SOCKS5 Proxies?
Windows 11 supports SOCKS proxy settings through the classic Internet Options interface, but not all apps use them. For SOCKS5 connections, you may need a compatible browser or app that supports direct SOCKS5 configuration.
Can I Set Up a Free Proxy on Windows 11?
Yes, you can use a free proxy if you have its server address and port. However, free proxies may have slow speeds, limited availability, or privacy risks. Avoid sending sensitive information through untrusted proxy servers.
Why Is My Proxy Not Working on Windows 11?
Common causes include incorrect server details, expired credentials, or an unavailable proxy server. Check your Windows 11 proxy settings and test your internet connection without the proxy to help identify the problem.
Does Setting Up a Proxy on Windows 11 Affect All Applications?
No, not every application follows Windows 11 system proxy settings. Browsers like Microsoft Edge often use these settings, while some other apps require separate proxy configuration.
Conclusion
Learning how to set up a proxy on Windows 11 is fairly simple once you know where to find the settings and what details to enter. You can configure a proxy manually, use automatic detection, or add a setup script based on your needs. After setup, remember to check your public IP address and test a few websites to make sure the connection works as expected.
The right proxy also depends on what you plan to do online. If you need residential IPs for market research, e-commerce, or everyday browsing, you can explore PuraRoute and choose between dynamic and static residential proxies. Whatever option you use, taking a few minutes to check your settings can help you avoid common connection problems.
