How to Purchase and Use PuraRoute Dynamic Residential Proxies
Guide for beginners on how to quickly purchase and use Dynamic residential proxies.
What is Dynamic Residential Proxies?
PuraRoute Dynamic Residential Proxies route traffic through real residential IP networks, mimicking natural local browsing patterns to pass target site checks more smoothly. It supports both rotating and sticky session modes: IPs rotate automatically for high-volume tasks, or stay fixed within a defined session window. Smart route selection cuts down connection latency.
Supporting HTTP(S) and SOCKS5 protocols and flexible geo-targeting, it is billed by traffic volume.
It fits web scraping, e-commerce monitoring, market research, ad verification and other data-heavy workflows. The expanding IP pool and standard protocol support enable seamless integration with popular programming languages and tools.
How to Use Dynamic Residential Proxies
1. Register and log in to PuraRoute Proxy
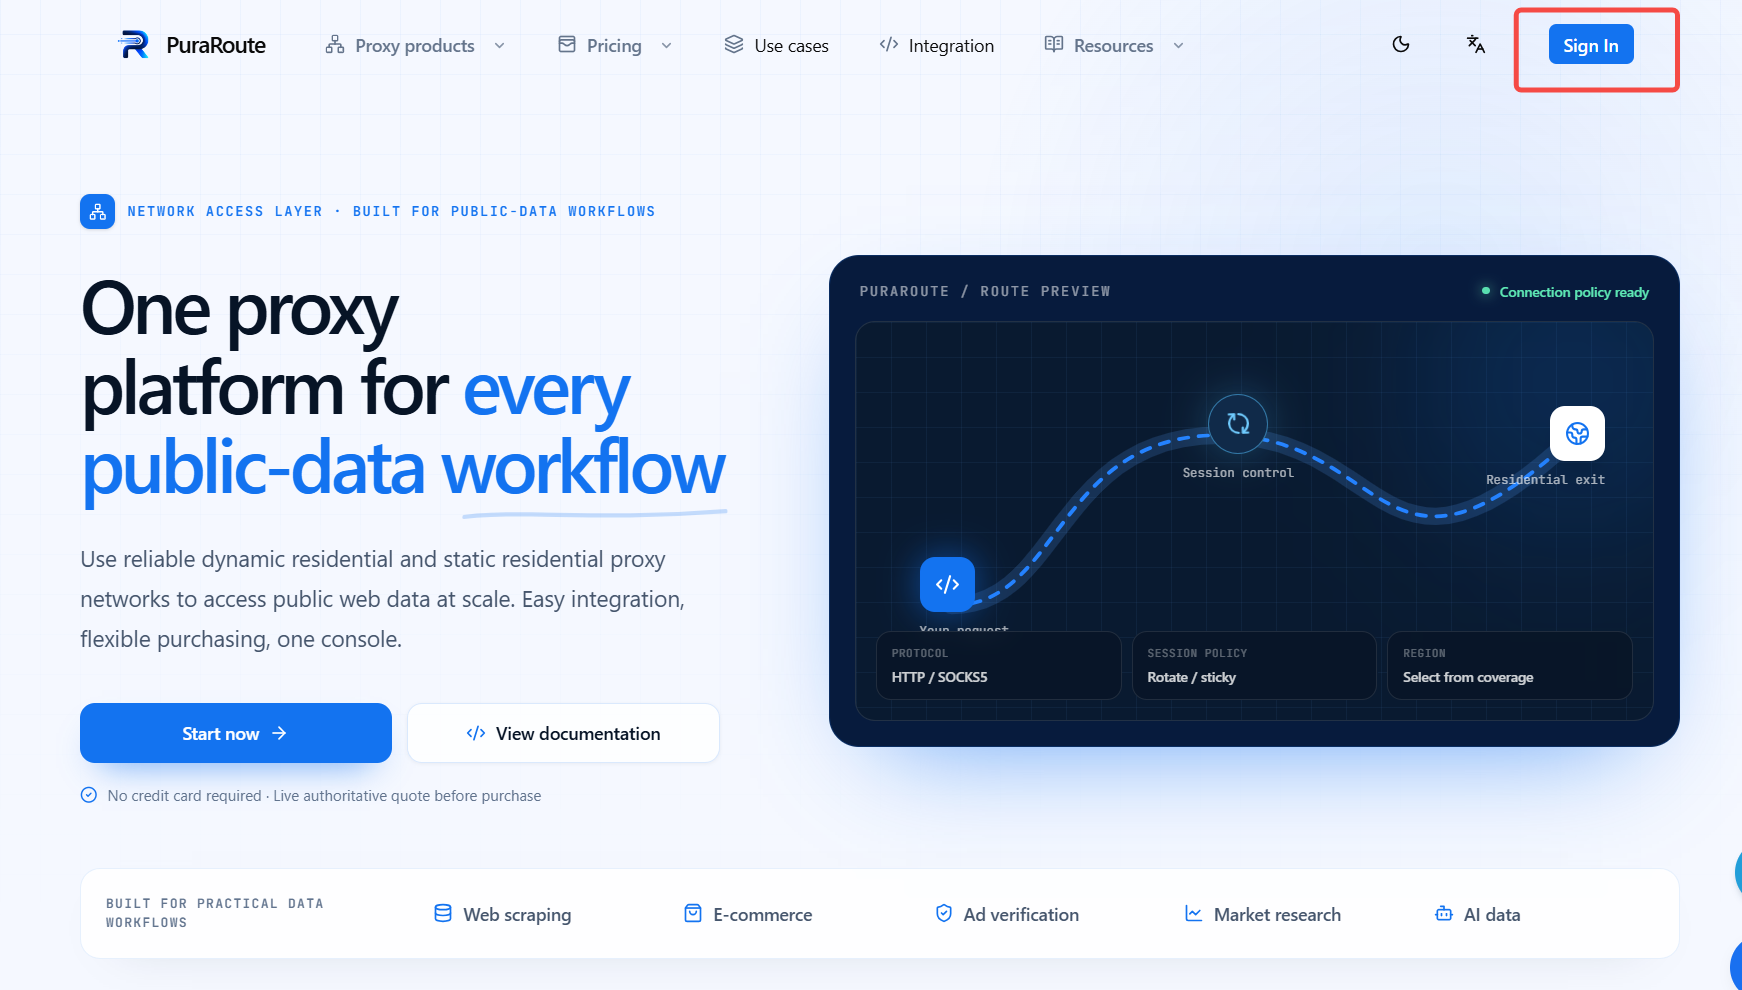
Go to the official PuraRoute website and click [Sign in].
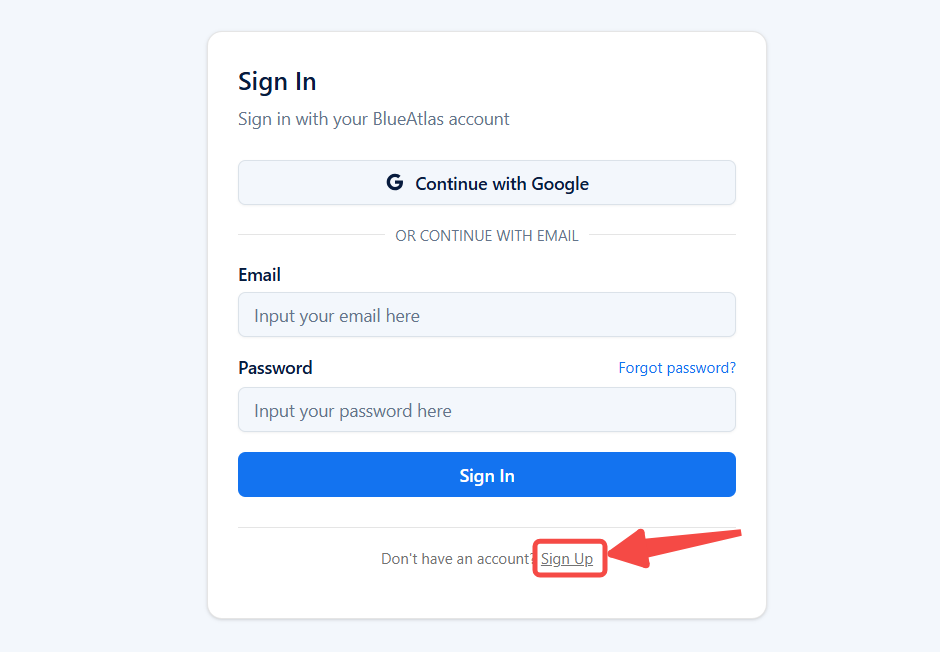
Click [Sign up] to open the registration page.
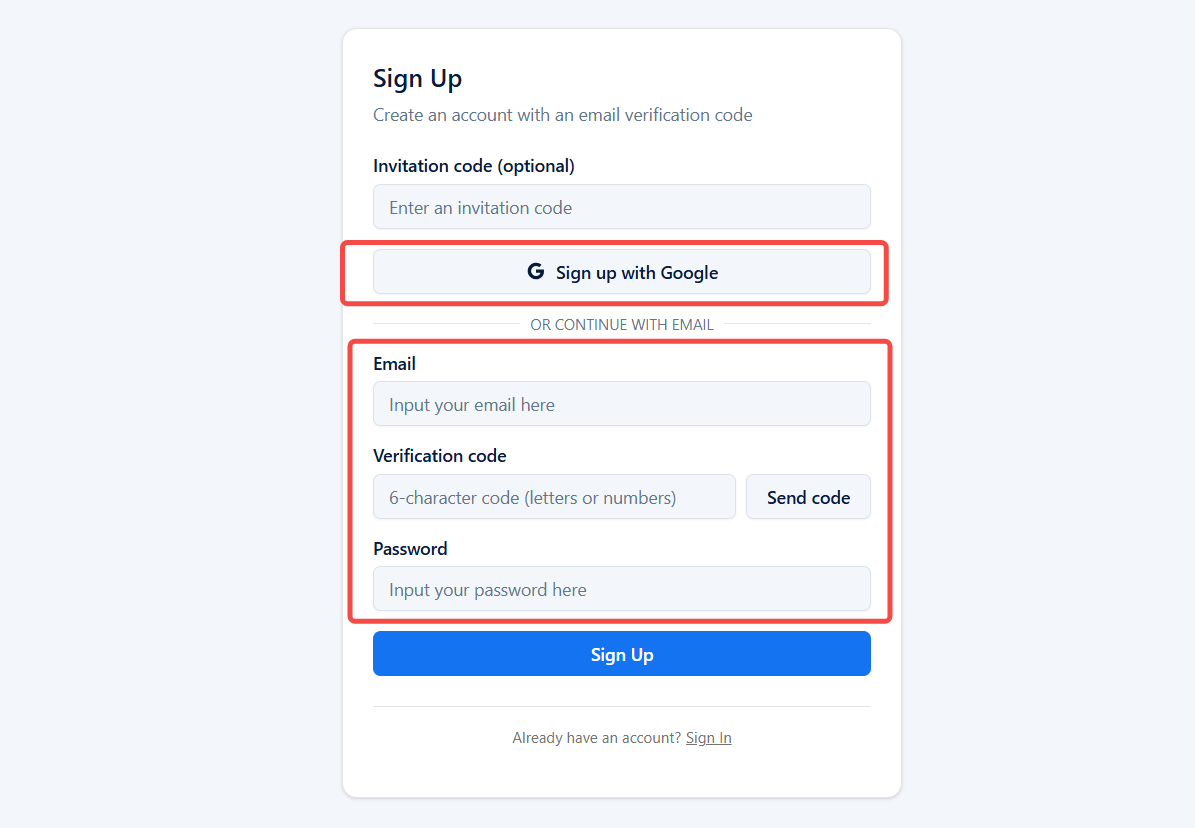
- Email registration: Fill in your email address, verification code and password, then click [Sign up] to finish registration.
- Quick registration with Google account: Click [Sign up with Google] to register.
2. Purchase Dynamic Residential Proxy
2.1 Wallet Top‑up
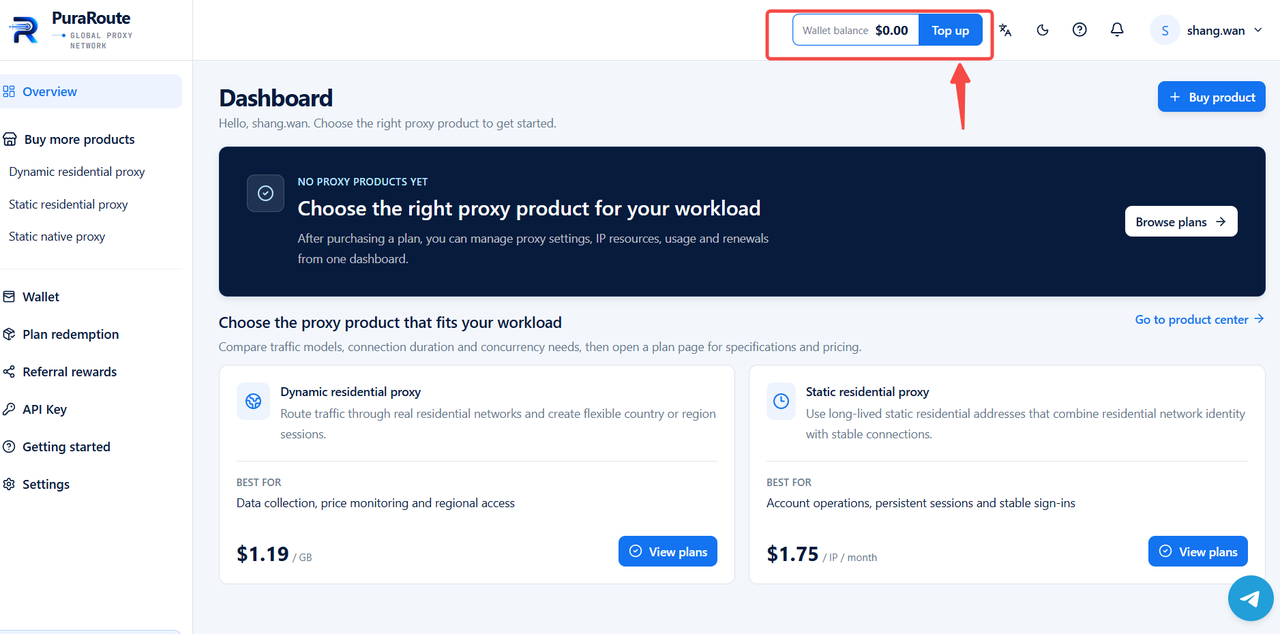
Locate [Top up] in the upper‑right corner of the page to fund your wallet for subsequent proxy purchases.
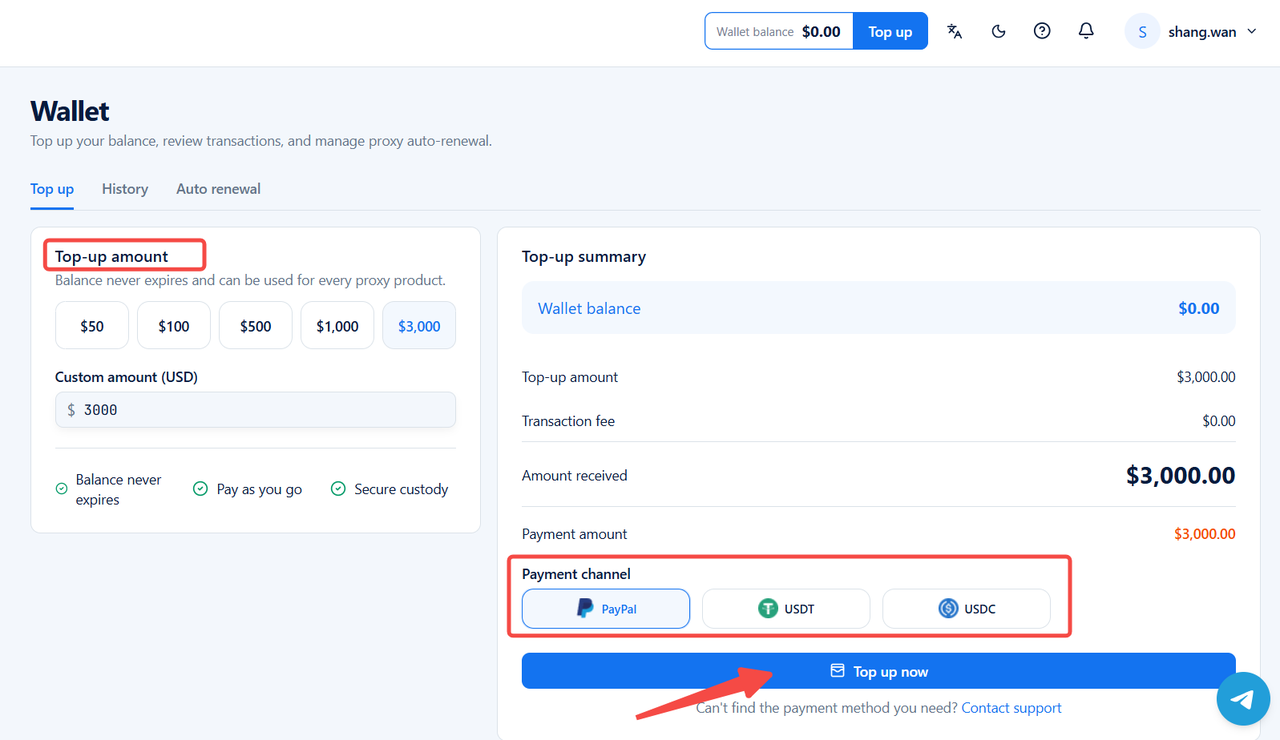
Select your top‑up amount. After confirmation, view payment details under [Top‑up summary]. Complete payment via PayPal, USDT or USDC.
2.2 Choose dynamic traffic purchase
On the PuraRoute page, locate [Dynamic Residential Proxy] in the left‑hand dashboard.Here you can view relevant information:
- Choose Plan: You may select from four traffic tiers with 10GB/30 Days, 20GB/30 Days, 50GB/30 Days, and 100GB/30 Days.
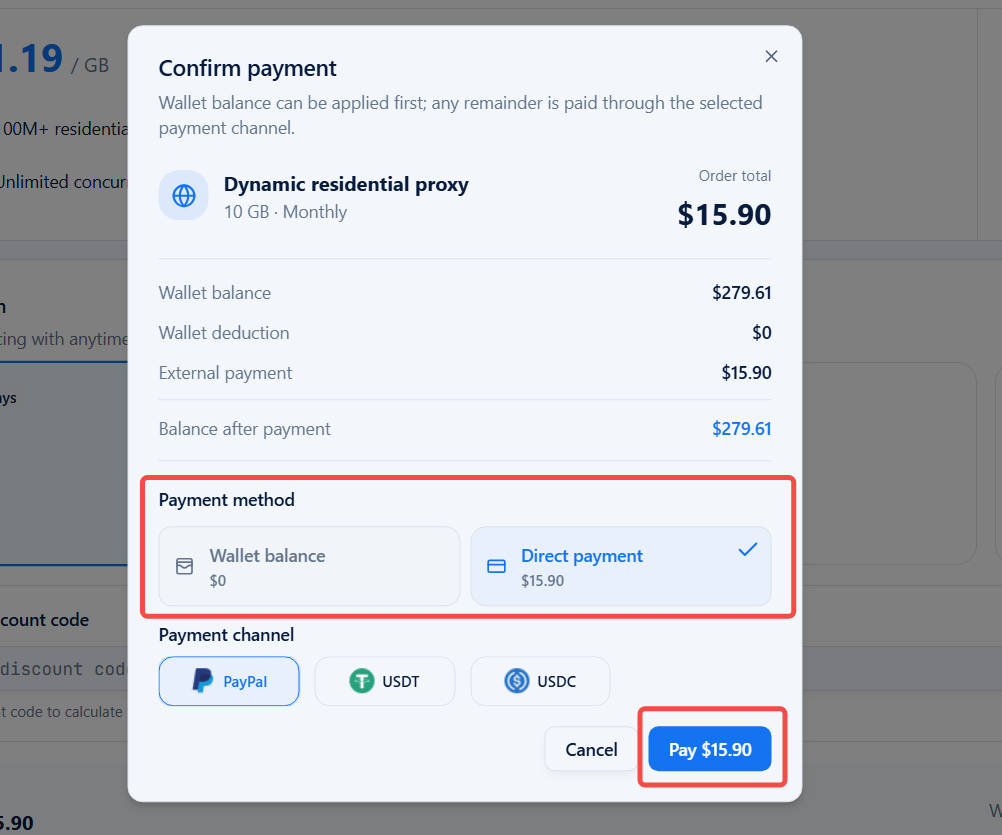
After selecting the appropriate tier, click [Buy now], then pay via Wallet balance or Direct payment.
2.3 View and Create Dynamic Residential Proxy Details
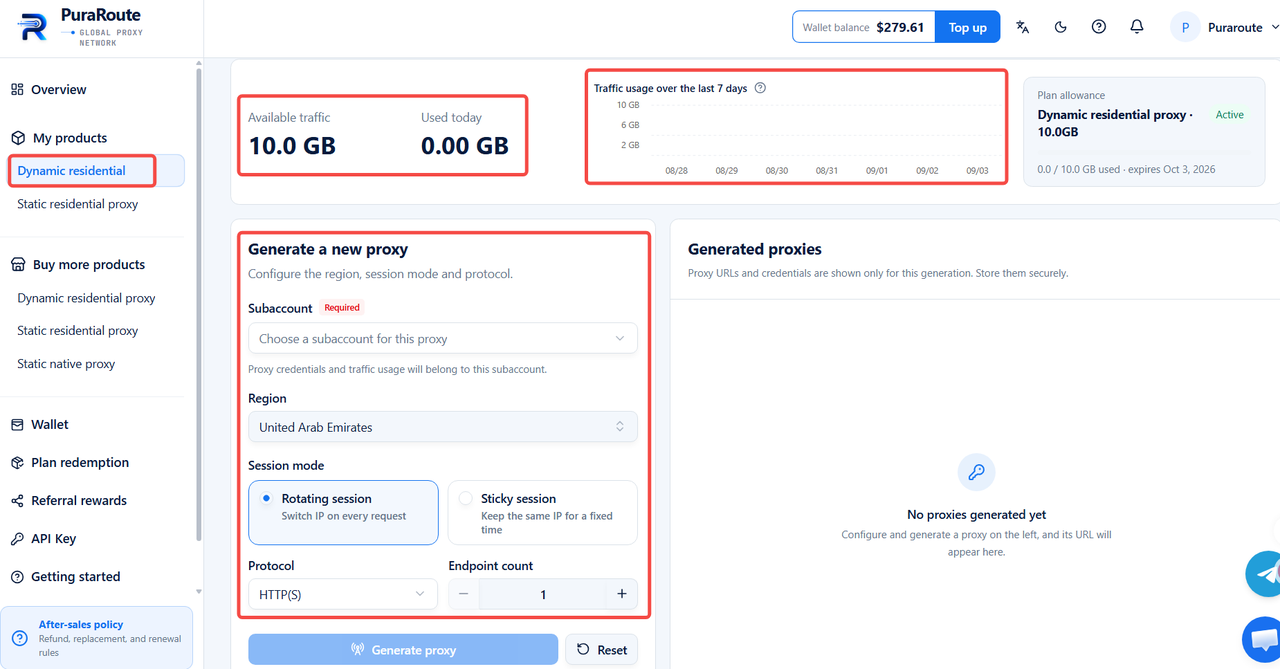
Navigate to [My products] > [Dynamic Residential Proxy] on the left‑side dashboard. You can view the following relevant information:
- Available traffic: Displays current available traffic, which is shared across all sub‑accounts.
- Used today: Shows traffic consumed on the current day.
- Traffic usage over the last 7 days: Presents the traffic consumption trend for the past seven days.
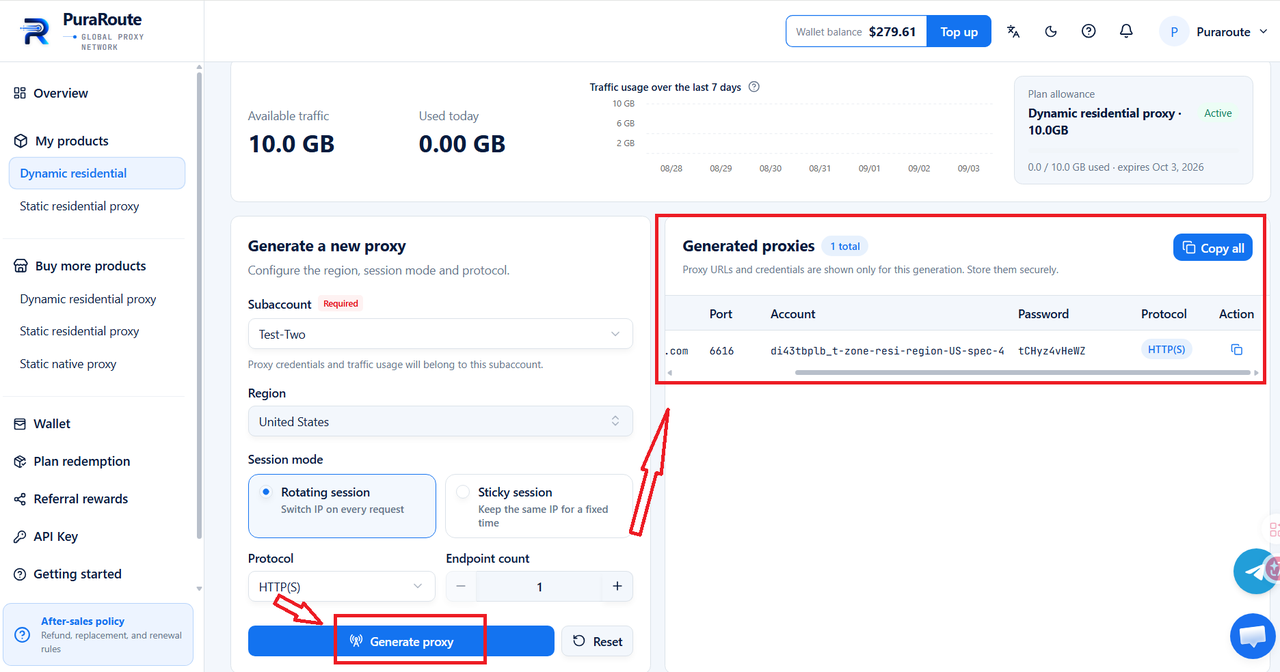
- Generate a new proxy: You need to select a subaccount, and configure the region, session mode and protocol.
2.4 Generate a new proxy
Click [Create subaccount] to create a subaccount for usage.
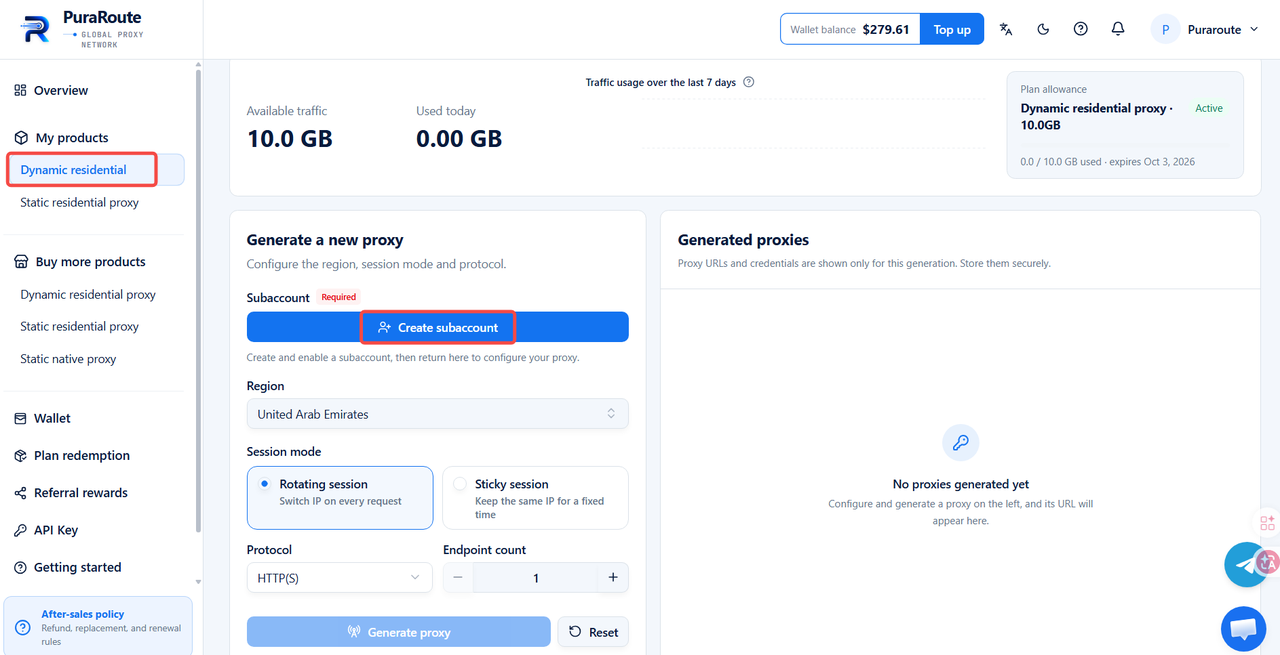
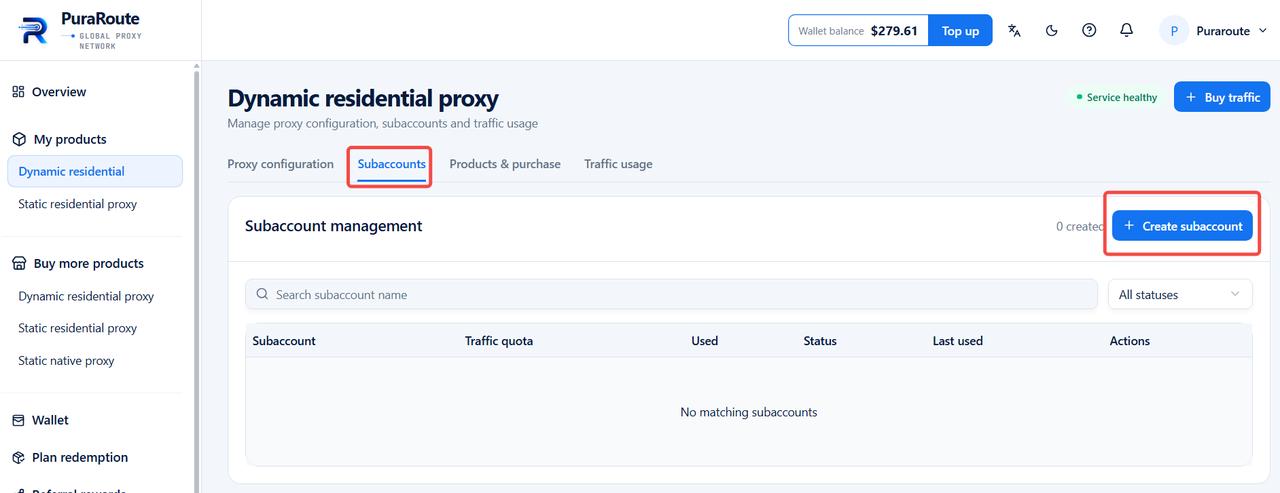
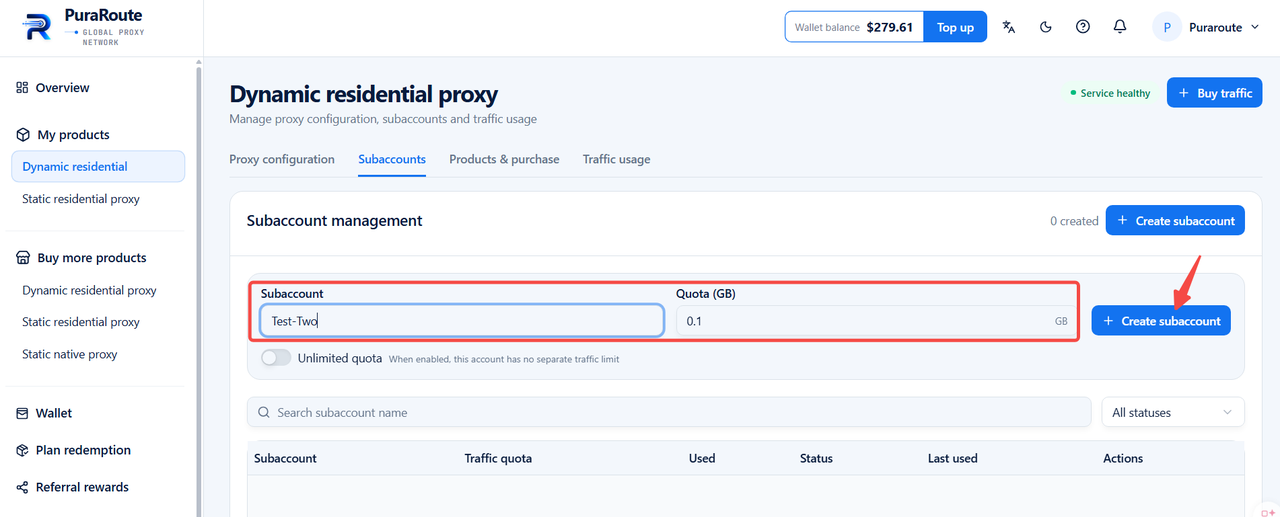
You will be redirected to the Subaccounts page. Click [+Create subaccount], fill in the subaccount ID and Quota (GB), then click [+Create subaccount] to finish creation.
Once the subaccount is created, click [Proxy configuration] to return to the configuration page and pick the newly‑created subaccount.
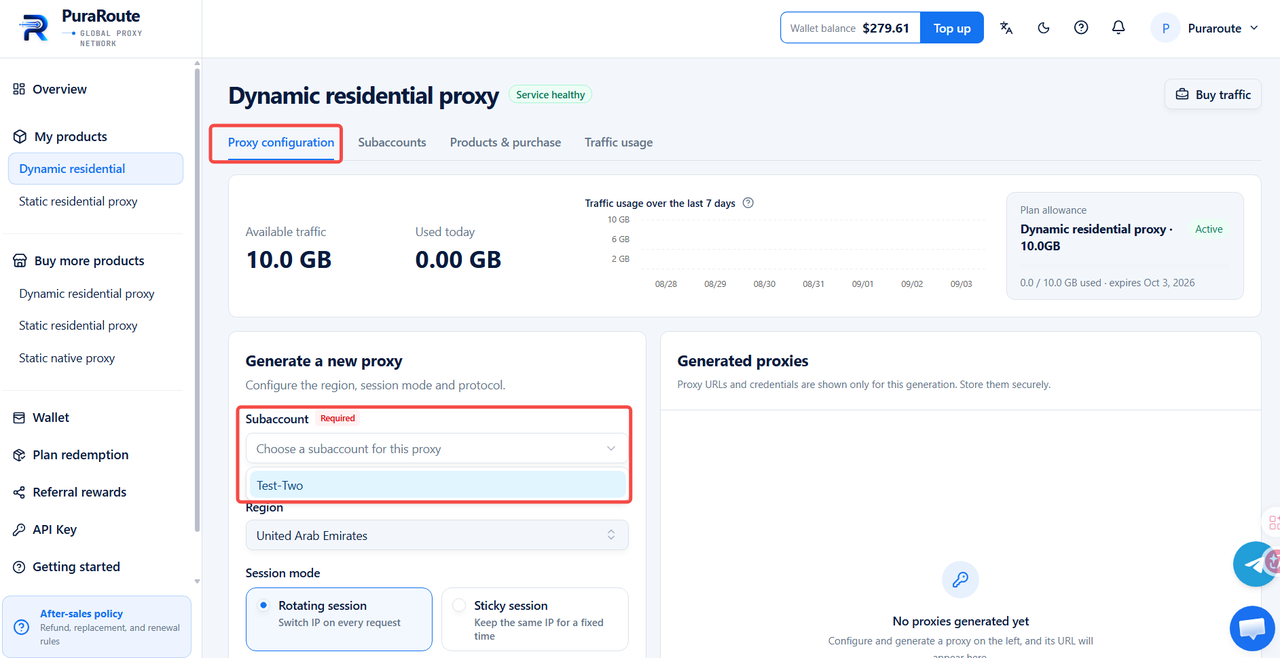
Select your preferred Region, Session mode (Rotating session and Sticky session available), Protocol and Endpoint count, then click [Create Proxy] button to complete setup. Your newly‑generated dynamic residential proxy will appear on the right‑hand side.