How to Use PuraRoute with Paraturbo
Guide for beginners on how to quickly configure PuraRoute proxies into Paraturbo.
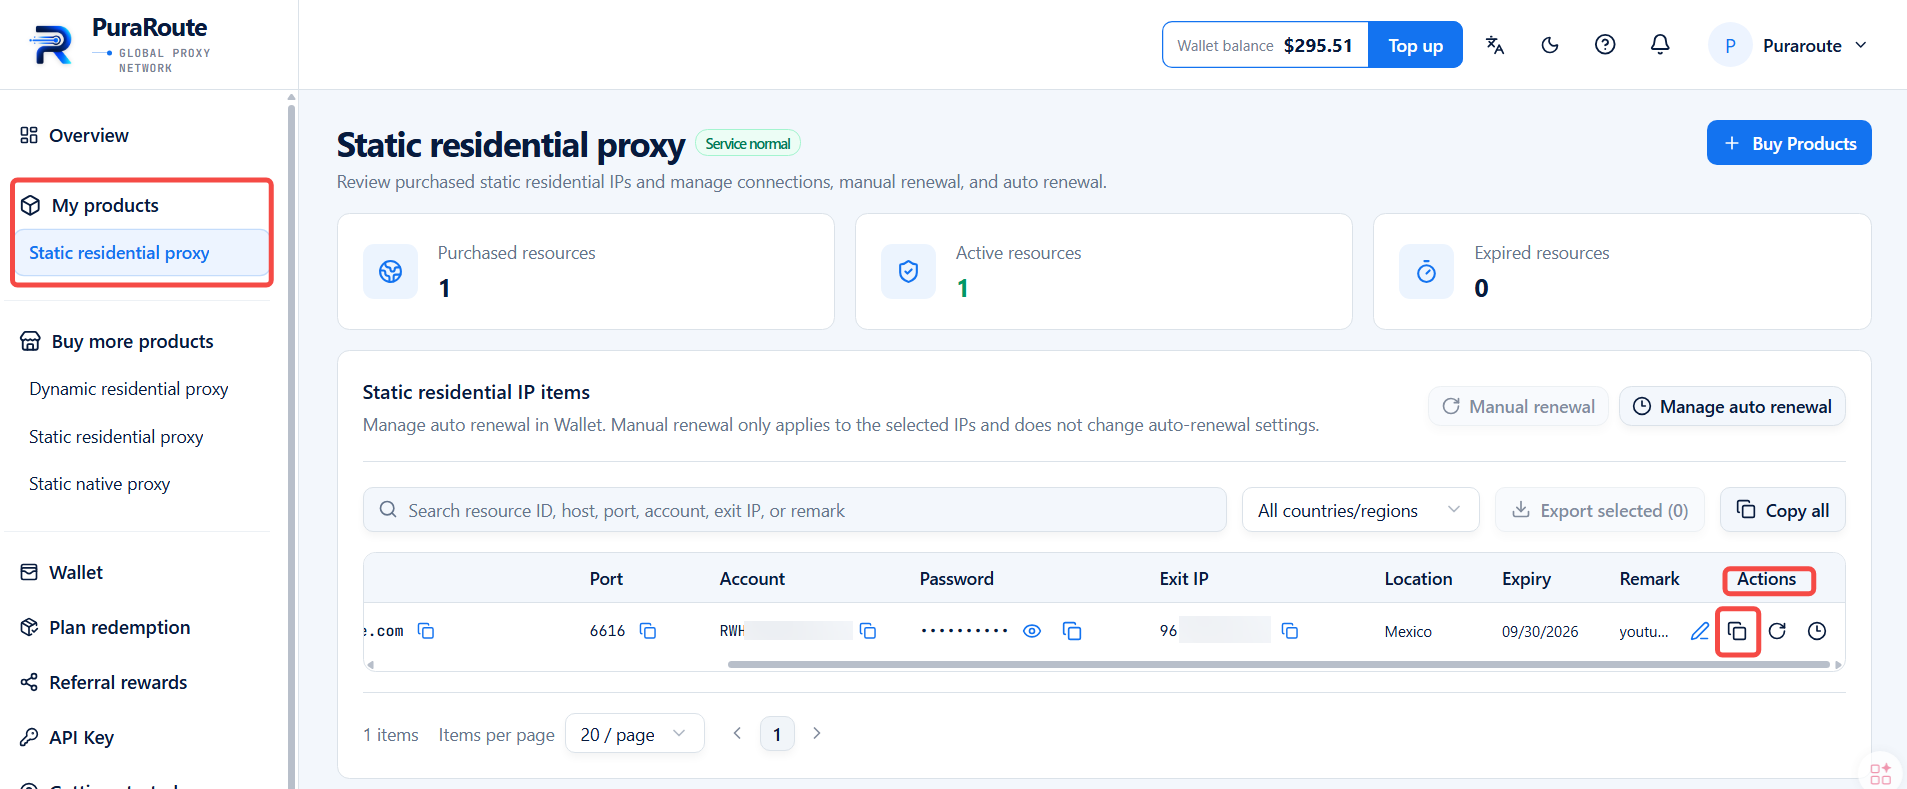
After you complete your RuraRoute Proxy purchase, you may directly copy your proxy details and configure them for use within the Paraturbo browser.
Operation Guide
I. Configure PuraRoute Proxies into Paraturbo
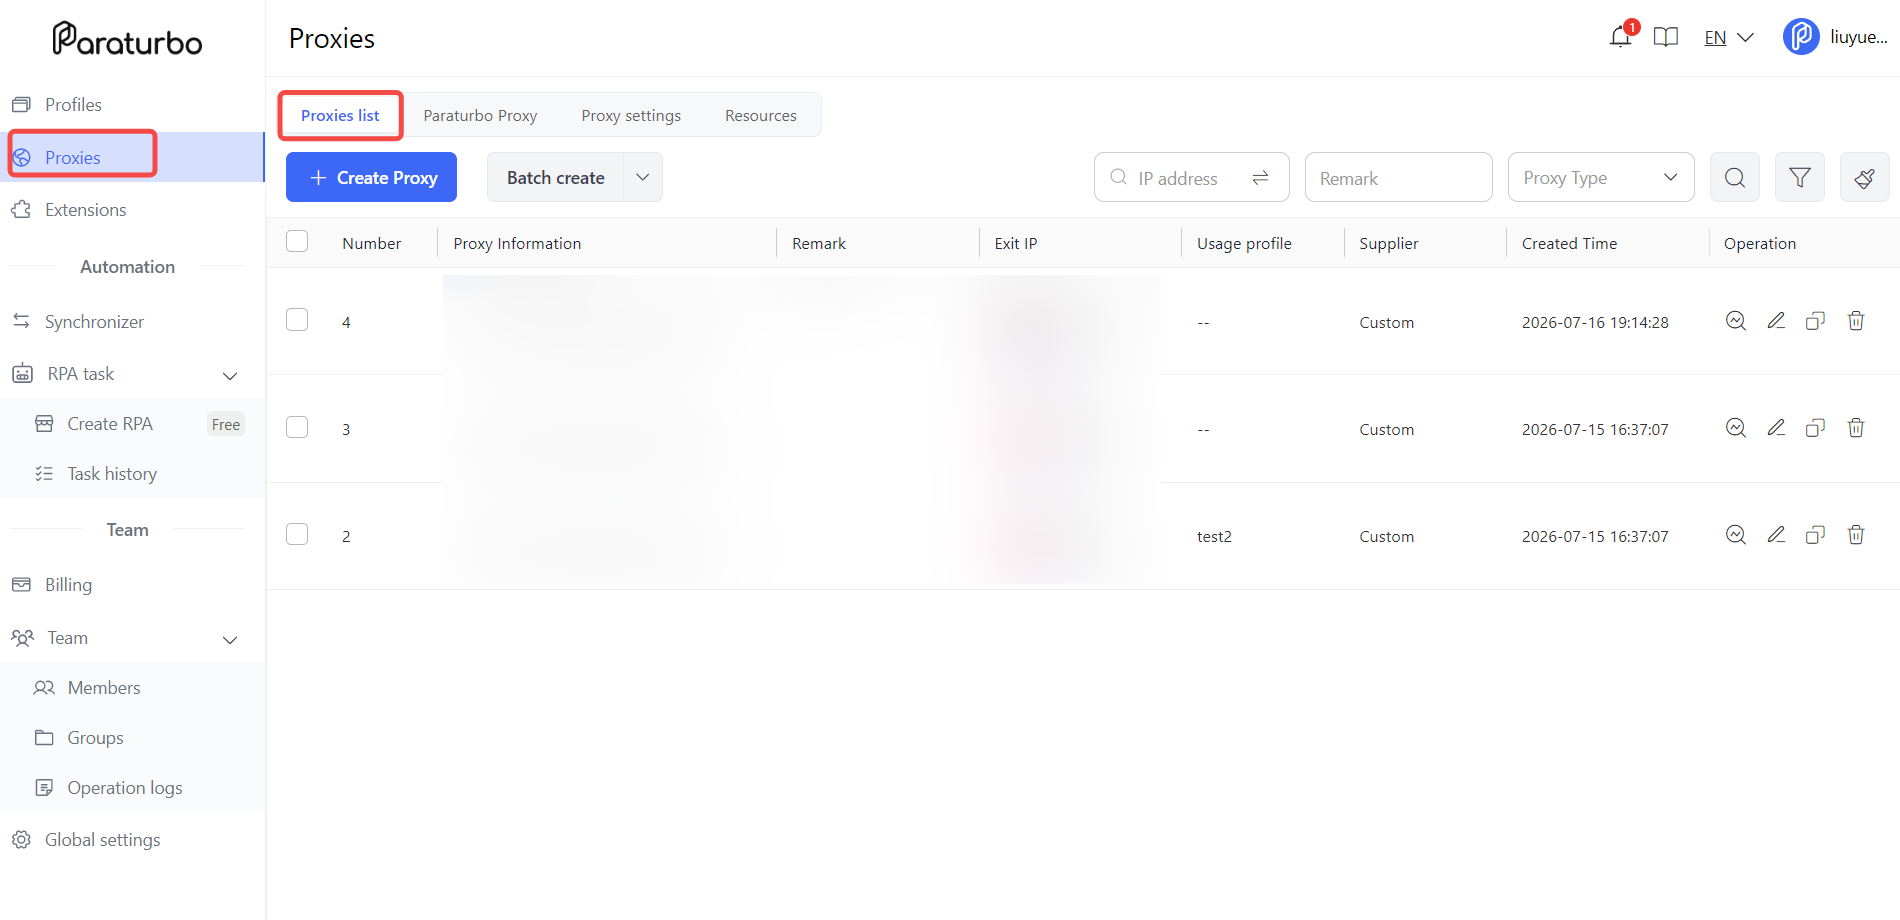
1. Access the Proxies list
Open and log in to Paraturbo , locate [Proxies] on the left‑hand dashboard and open [Proxies list].
2. Fill in proxy information
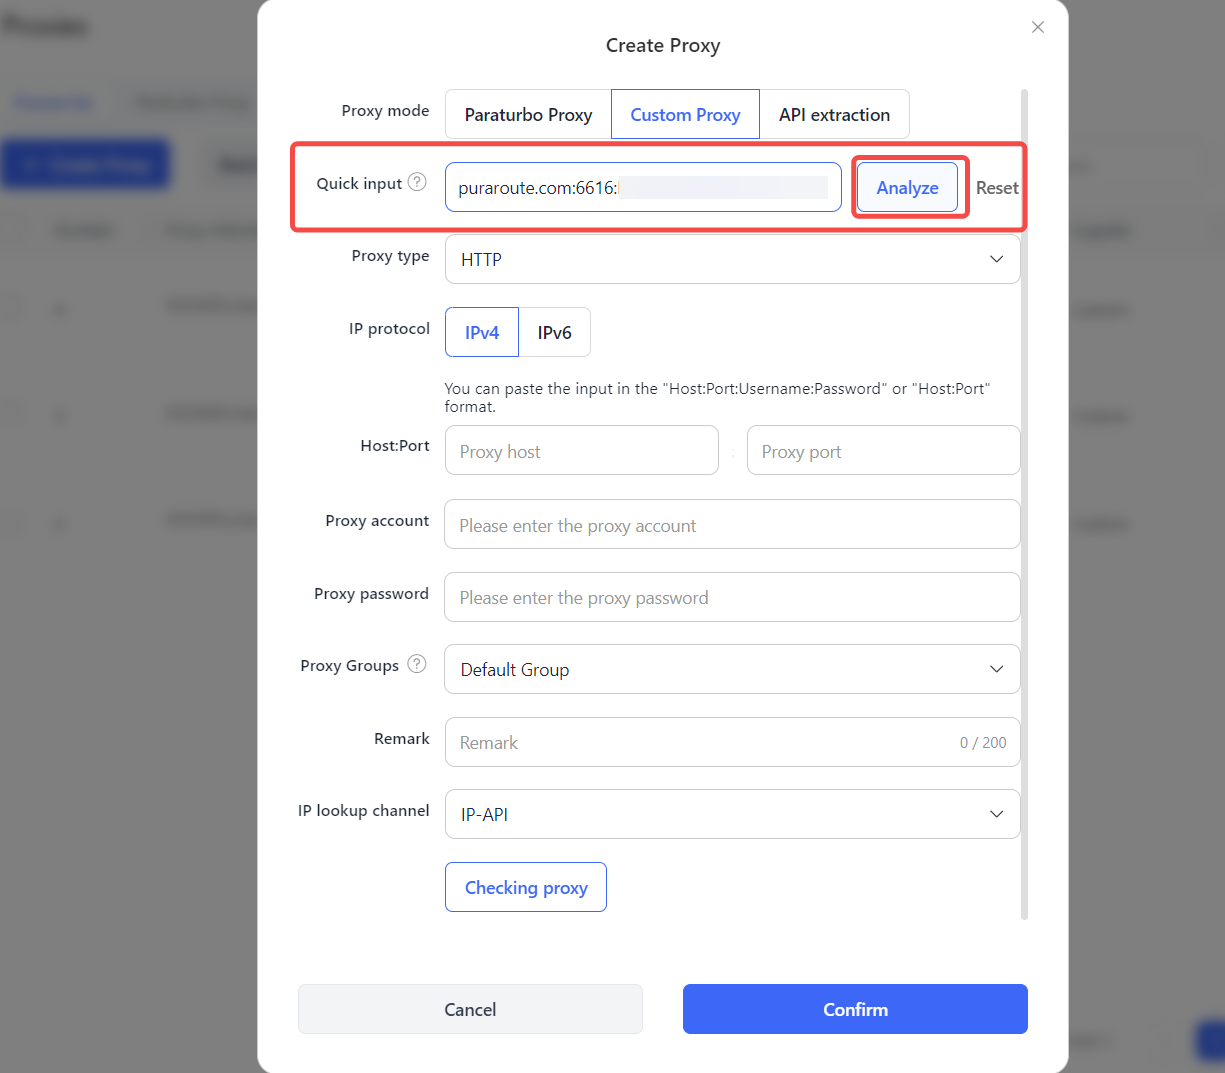
Click [Create Proxy] > [Custom Proxy]. Enter the Proxy host, Port, Account and Password copied from PuraRoute Proxy into the corresponding fields.
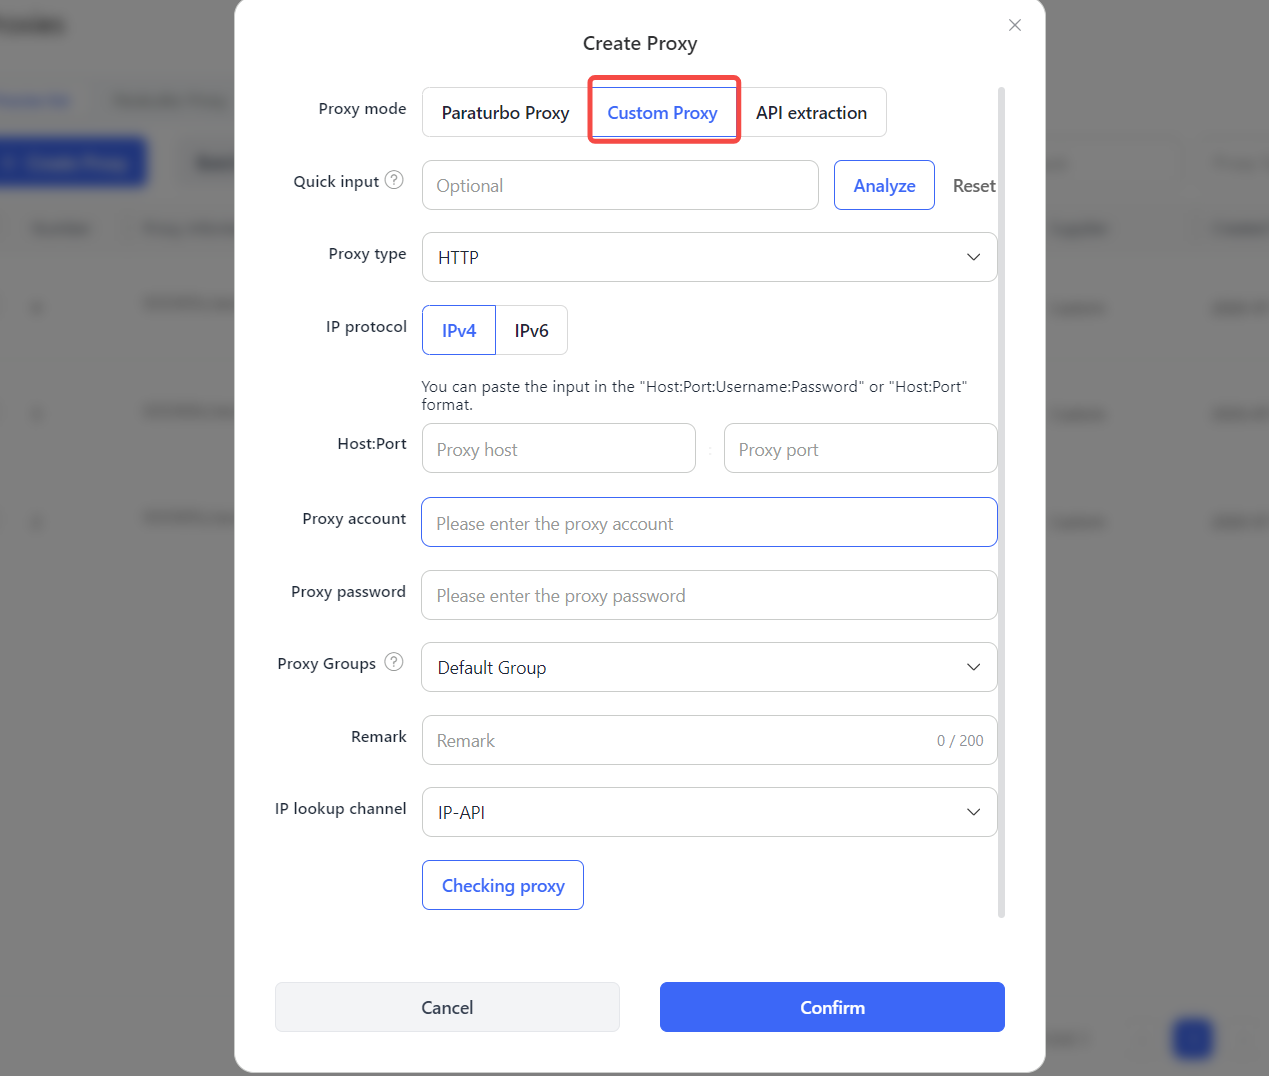
You may also copy full proxy details directly from PuraRoute Proxy and use Paraturbo ’s Quick input function. Click [Analyze] to auto‑parse the information and finish filling in the form quickly.
3. Proxy detection
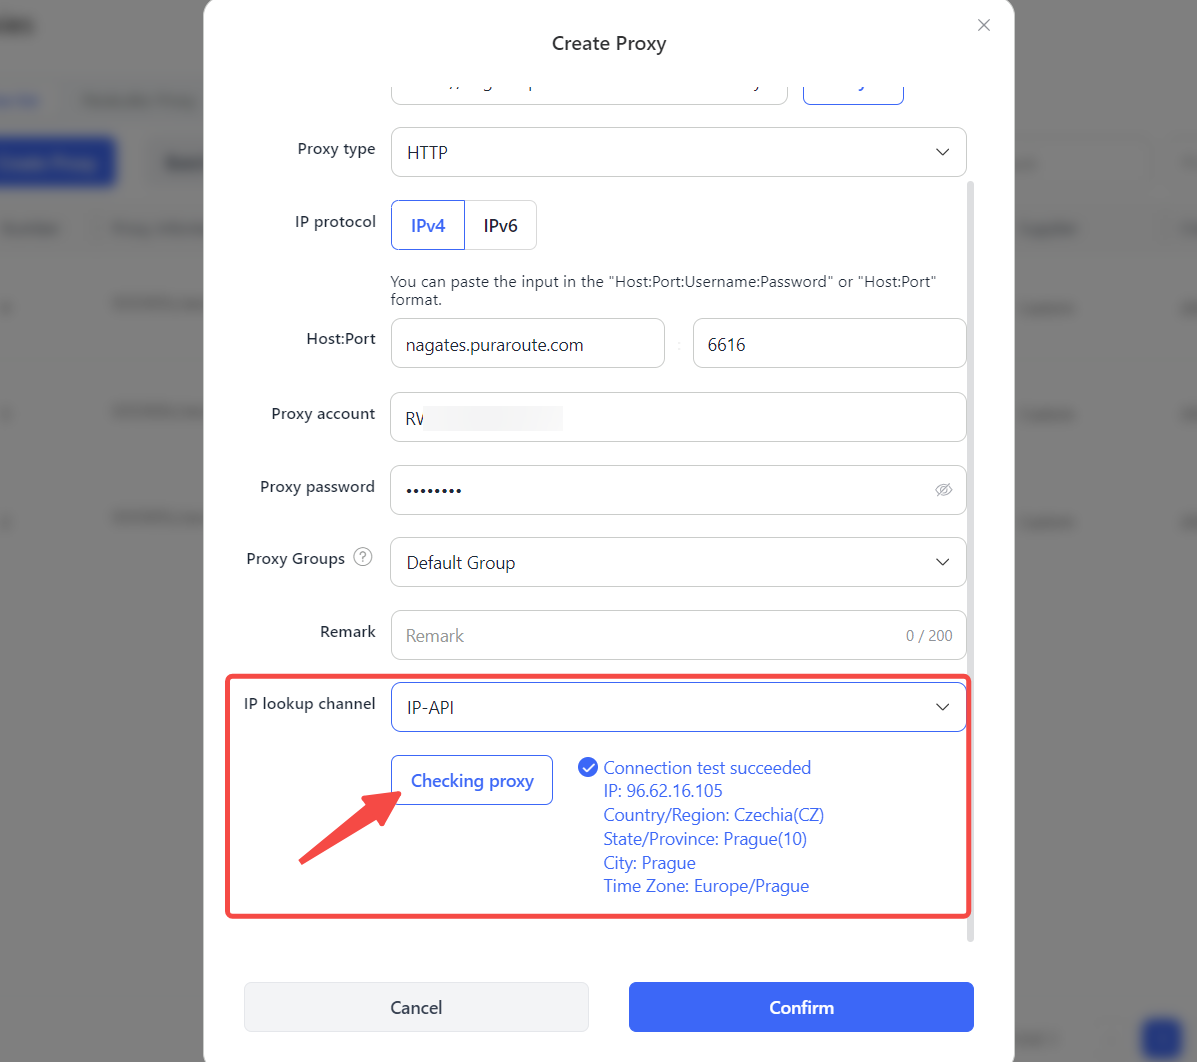
Select an appropriate IP lookup channel, click [Checking Proxy] to verify whether the proxy connects successfully. Upon successful connection, click the Confirm button to finalize proxy configuration.
II. Assign proxy to profile
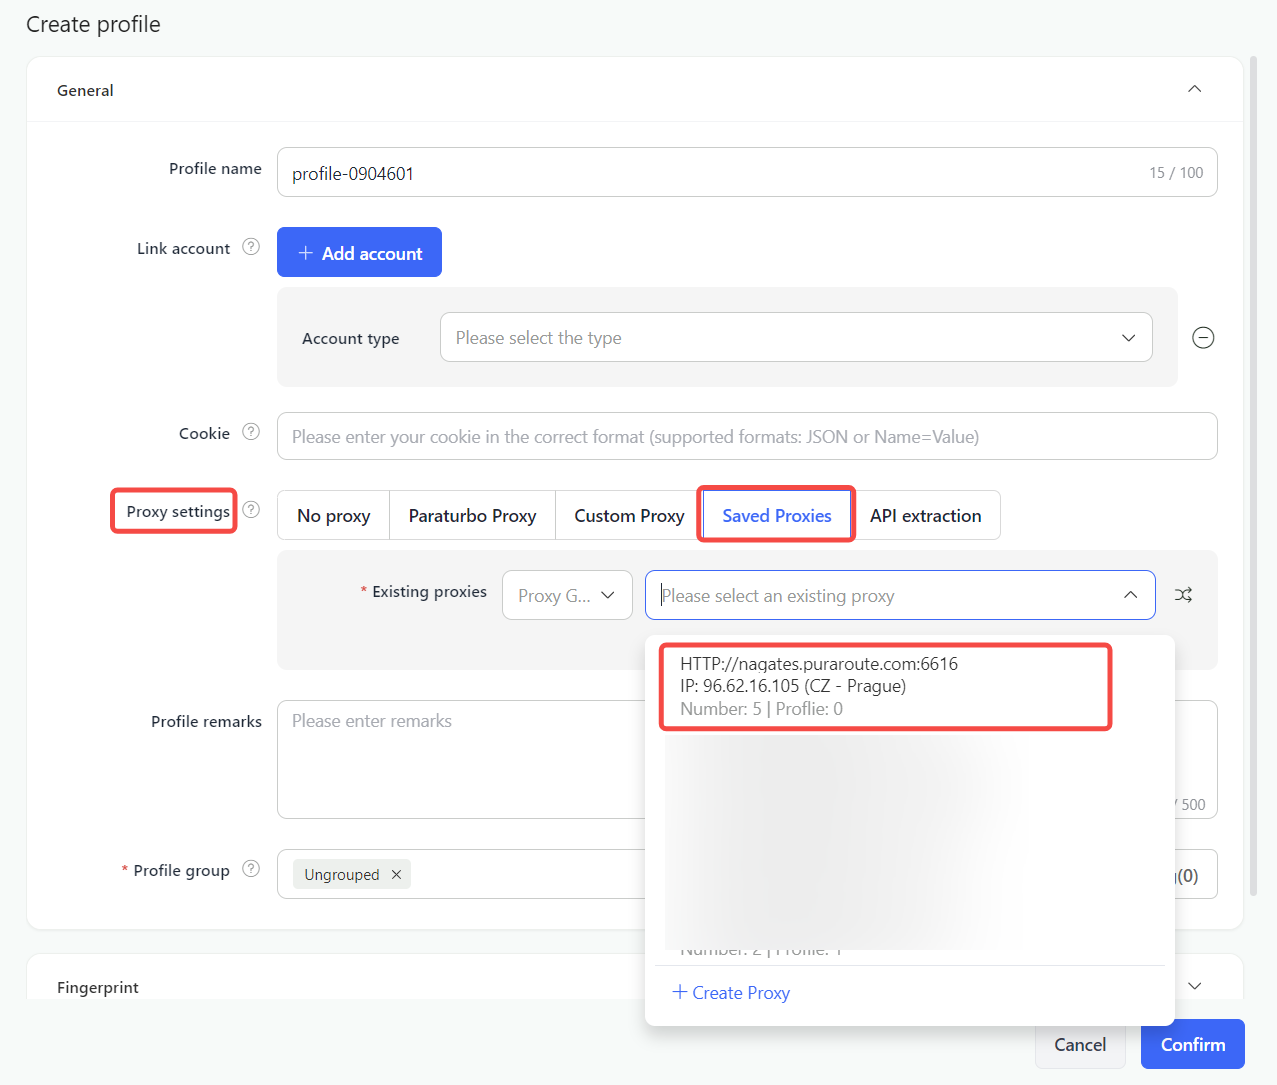
When creating or editing a profile, go to [General] > [proxy settings] > [Saved Proxies], then select the imported proxy you just added.